Homemade Vegan Ravioli Recipe

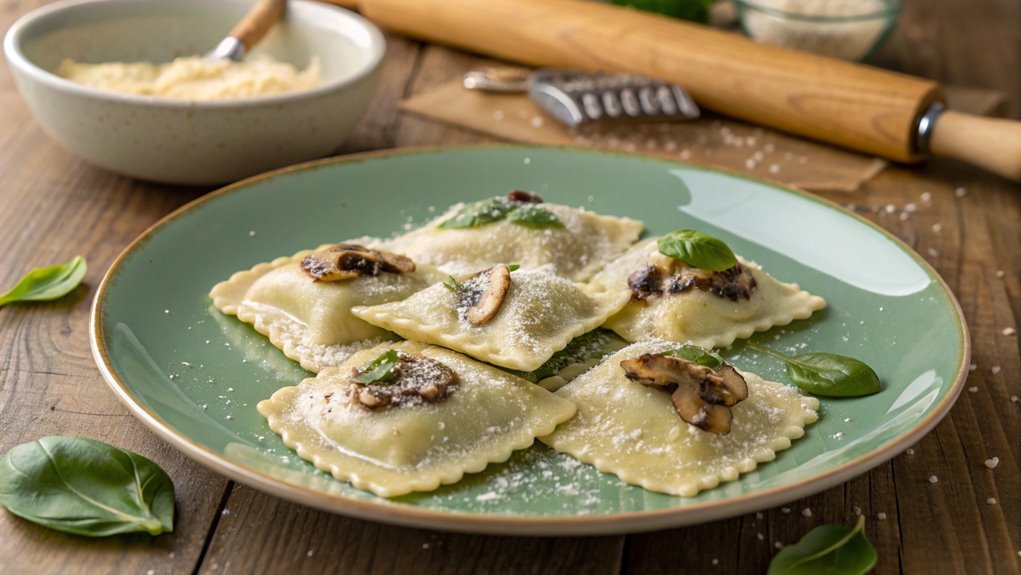
Creating homemade vegan ravioli is a fun and rewarding experience. Enjoy the satisfaction of crafting each piece from scratch, filling your kitchen with delightful aromas. Surprise and delight your guests with a delicious, entirely plant-based dish. Ready to embark on this culinary adventure? Let’s make your own vegan ravioli!
Recipe
Embarking on the journey of making homemade vegan ravioli is a rewarding culinary adventure. The process begins with creating a smooth dough by combining flour, salt, warm water, and olive oil. Vegan ravioli dough requires only 4 ingredients, while the dough rests, focus on preparing a delightful vegan filling using homemade ricotta blended with spinach, garlic, and your favorite herbs. This combination promises a flavorful experience packed into every bite.
Creating your ravioli allows you to explore a variety of fillings and sauces, making each batch unique. Once the filling is prepared, cut out your ravioli shapes, add the filling, and seal them tightly. Boil the ravioli until they gracefully float to the top of the pot, signaling their readiness. Serve them with your chosen sauce and relish every mouthful of your homemade creation!
Ingredients:
- All-purpose flour
- Salt
- Warm water
- Olive oil
- Homemade vegan ricotta
- Fresh spinach
- Garlic
- Fresh herbs (such as basil, oregano, or parsley)
Instructions:
- Prepare the Dough: In a large bowl, combine the flour and salt. Gradually add warm water and olive oil, mixing until a smooth dough forms. Knead the dough for approximately 5-7 minutes until it’s elastic and smooth. Cover the dough with a damp cloth and let it rest for about 30 minutes.
- Make the Filling: While the dough rests, prepare the filling. In a mixing bowl, combine the homemade vegan ricotta, chopped fresh spinach, minced garlic, and finely chopped herbs. Mix until well-blended and set aside.
- Shape the Ravioli: Roll out the rested dough on a floured surface until it’s about 1/8-inch thick. Using a cookie cutter or a knife, cut out your desired ravioli shapes. Place a small spoonful of the prepared filling in the center of each cut-out piece of dough.
- Seal the Ravioli: Lightly moisten the edges of the dough with water, then place another piece of dough on top to cover the filling. Press the edges together firmly to seal, ensuring there are no air pockets. Use a fork to crimp the edges for a decorative touch.
- Cook the Ravioli: Bring a large pot of salted water to a boil. Carefully drop the ravioli into the boiling water. Cook until the ravioli float to the top, which should take about 3-4 minutes. Once cooked, remove them with a slotted spoon and drain well.
- Serve: Serve the cooked ravioli with your choice of sauce, such as marinara, pesto, or a simple olive oil and garlic drizzle.
Extra Tips:
When cooking homemade vegan ravioli, ensure the dough isn’t too sticky or dry; adjust with flour or water as needed. If you’re experimenting with different fillings, make sure they aren’t too watery to prevent the ravioli from bursting during cooking.
For a richer flavor, consider adding nutritional yeast to the filling. Lastly, if you’re preparing a large batch, freeze the uncooked ravioli in a single layer before transferring them to a container for longer storage.
Frequently Asked Questions
Can I Use Gluten-Free Flour for the Pasta Dough?
Absolutely, you can use gluten-free flour for your pasta dough! It opens up a world of delicious gluten-free alternatives that bring joy to your cooking.
By mixing gluten-free all-purpose flour with a bit of xanthan gum, you’ll create a wonderfully textured dough. Just remember to knead it well and let it rest.
You’ll be amazed at how versatile and delightful gluten-free pasta can be, so give it a try and savor the experience!
How Do I Store Leftover Vegan Ravioli?
Think of your leftover vegan ravioli as little treasures waiting to be enjoyed again!
For ideal storage, pop them in an airtight container and tuck them into the fridge for about three days. If you’ve made a big batch, freeze them for up to three months!
Refrigeration tips like drizzling a bit of olive oil can help prevent sticking.
Next time, you’ll savor those delightful bites with ease! Enjoy every moment in your kitchen!
Can I Freeze Uncooked Ravioli?
Absolutely, you can freeze uncooked ravioli!
Just follow these freezing tips for the best ravioli texture. Start by placing your ravioli flat on a baking sheet, ensuring they don’t touch. Freeze them for a few hours until solid.
Then, transfer them to an airtight container or freezer bag. They store well for about a month.
What Fillings Are Best for Homemade Vegan Ravioli?
When you’re looking for the best vegetable fillings for your ravioli, you can’t go wrong with options like tofu ricotta, spinach with herbs, or a hearty mushroom-lentil mix.
Each filling offers delicious flavor profiles and pairs wonderfully with flavorful sauces like homemade tomato or a creamy vegan alfredo.
Experimenting with butternut squash or sweet potato adds a comforting twist—it’s exciting to create your unique vegan ravioli that’ll impress everyone!
How Long Does It Take to Make From Scratch?
When it comes to making something delicious from scratch, you really get to roll with the punches!
The total preparation time for your ravioli will take about 1.5 to 2 hours, including dough making and filling prep.
Once you’ve shaped those beautiful pockets, the cooking duration is just a few minutes—boiling them for 2-3 minutes.
This creative process is so rewarding, and you’ll savor the results! Give it a try!
Conclusion
Who needs fancy restaurants when you’ve mastered homemade vegan ravioli? With simple ingredients, you’ve crafted a delicious, impressively homemade dish.
Imagine sharing these tender, flavorful pockets with friends and family. It’s the ultimate way to showcase your cooking skills!
Roll up your sleeves, try this recipe, and enjoy the satisfaction of culinary triumph in your own kitchen.


